The Sticky Scrolling Effect lets you set a Container/Widget as sticky, so that it sticks to the top or bottom of the screen.
Create scrolling effect
- Login to WP Admin.
- Go to the container/widget where you want to implement sticky scrolling.
- Click the handle
 to edit.
 - Click Advance.
- Expand Motion Effects.
- Set Sticky. Following are the options:

- None – This removes the sticky header. Do not choose if you want to create a sticky header.
- Top – Choose to stick your header to the top of the screen.
- Bottom – Choose to stick your header to the bottom of the screen.
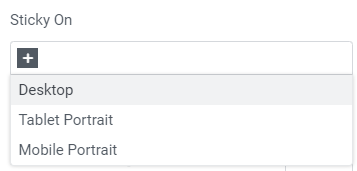
- In Sticky On, choose the devices your section should be sticky. Following are the options:

- Desktop – Sticky on desktop/laptops.
- Tablet Portrait – Sticky on tablets.
- Mobile Portrait – Sticky on mobiles.
- Set the following: (Displays only if Sticky is set to Top or Bottom)
- Offset – It pushes the sticky element up or down by pixels.
- Effects Offset – This is the number of pixels the user must scroll before the sticky effect begins.
- Stay in Column – Toggle to Yes if you want the section to remain in its own column. For details, see Sticky Inner Section Improvements.
- Click Publish.
Note
Effects Offset affects only if CSS was added to the sticky element. For details, see How To Create A Sticky Transparent Header Effect.

