
This guide will walk you through every step of the process, from the initial idea to a fully functioning, professional-looking blog, all without needing to write a single line of code.
The Enduring Power of Blogging
In a world saturated with fleeting social media content, a blog provides a dedicated space to share in-depth knowledge, tell compelling stories, and build lasting relationships with readers. It’s your corner of the internet where you control the narrative. For businesses, it’s a cornerstone of content marketing, driving organic traffic and establishing authority. For individuals, it’s a platform for personal branding, creative expression, and connecting with like-minded people across the globe.
Why WordPress is the Go-To Platform
When it comes to building a blog with true potential for growth, the self-hosted version of WordPress (WordPress.org) is the undisputed leader. Powering nearly half of all websites, its strength lies in its unmatched flexibility, scalability, and a vast community that provides endless support, themes, and plugins. WordPress gives you complete ownership and control, allowing your blog to evolve as your ambitions grow.
What You’ll Learn in This Guide
This guide is designed specifically for beginners. We will break down the entire process into manageable, step-by-step instructions. You will learn how to:
- Set the foundation: Choose a niche, domain name, and the right hosting.
- Design like a pro: Select a theme and use a visual builder to create a stunning design.
- Create and optimize content: Write your first post and install essential plugins for performance and SEO.
- Grow your blog: Promote your content and explore ways to monetize your efforts.
Let’s begin the journey of turning your idea into a published reality.
Part 1: The Foundation – Getting Your Blog Online
Before you can share your voice with the world, you need to lay the groundwork. This section covers the essential first steps to get your blog up and running, from defining your focus to securing your online address and hosting.
Step 1: Choosing Your Niche
A successful blog starts with a clear focus. A niche is the specific topic or area of interest your blog will be about. Choosing the right one is crucial for attracting a dedicated audience.
The Intersection of Passion, Expertise, and Profitability
The ideal niche lies at the crossroads of three things:
- Your Passion: What subject could you talk about for hours? Enthusiasm is contagious and will keep you motivated to create content consistently.
- Your Expertise: What do you know well? Your knowledge adds credibility and provides real value to your readers.
- Audience Interest: Are there people actively searching for information on this topic? A passionate audience is essential for growth.
Brainstorm topics that fit these criteria. Think about your hobbies, professional skills, or life experiences.
Tools and Techniques for Niche Research
Once you have a few ideas, it’s time to validate them. You need to ensure there’s an audience for your chosen topic.
- Analyze Competitor Blogs: Look at other blogs in your potential niche. What topics do they cover? What seems to be popular? Identifying gaps in their content can reveal a unique angle for your own blog.
- Use Google Trends: This tool shows you the popularity of a search term over time. It helps you see if a niche is a fleeting trend or has sustained interest.
- Basic Keyword Research: Use free keyword tools to see what specific questions people are asking related to your topic. This not only validates interest but also gives you a starting point for future blog post ideas.
Step 2: Selecting a Domain Name and Hosting
Your domain name and web hosting are two of the most important foundational elements of your blog.
What is a Domain Name and Why It Matters
Your domain name is your blog’s address on the internet (e.g., yourblogname.com). It’s how people will find you, so it should be memorable and easy to type.
Here are a few tips for choosing a great domain name:
- Keep it Short and Memorable: Avoid long, complex names.
- Make it Easy to Spell: If people can’t spell it, they can’t find it.
- Use Keywords: If it makes sense, include a keyword related to your niche (e.g., travelwithjane.com).
- Stick with .com: It’s the most recognized and trusted domain extension.
Understanding Web Hosting
If your domain name is the address, web hosting is the plot of land where your website’s files are stored. Good hosting is critical for ensuring your blog is fast, secure, and always available to your visitors. Slow-loading sites frustrate users and rank poorly in search engines.
Introducing Elementor Hosting: A Hassle-Free Solution

For beginners, navigating the world of web hosting can be intimidating. This is where a managed WordPress hosting solution shines. Elementor Hosting is an excellent option because it’s designed to provide a seamless and optimized environment for your WordPress site.
Key Benefits of Elementor Hosting
- All-in-One Support: One of the biggest frustrations for beginners is dealing with technical issues. If your site has a problem, is it the hosting or a plugin? With Elementor Hosting, you get support for both your hosting and the Elementor page builder from a single team of experts, eliminating guesswork and finger-pointing.
- Peak Performance and Security: Built on the world-class infrastructure of Google Cloud, Elementor Hosting is engineered for speed and reliability. It includes a Content Delivery Network (CDN) from Cloudflare, which helps your blog load quickly for visitors worldwide. It also comes with enterprise-grade security features like a free SSL certificate, a Web Application Firewall (WAF), and automatic backups to keep your site safe.
- Built to Scale: As your blog grows, your hosting needs to keep up. Elementor Hosting can automatically accommodate traffic spikes without slowing down your site, giving you peace of mind as your audience grows.
Step 3: Installing WordPress and Initial Setup
With your domain and hosting secured, it’s time to install WordPress, the software that will power your blog.
The One-Click WordPress Installation
Gone are the days of complicated software installations. Modern hosting providers, including Elementor Hosting, offer a “one-click” installation process that sets up WordPress for you automatically. During the setup, you’ll create your WordPress username and password. Be sure to save these in a secure location.
Your First Look at the WordPress Dashboard
Once installed, you can log in to your WordPress dashboard. This is the control center for your entire blog. It might look a little overwhelming at first, but you’ll quickly get the hang of it. Here are the key areas:
- Posts: Where you’ll write and manage your blog articles.
- Pages: For creating static pages like your “About” or “Contact” page.
- Appearance: To manage your theme and customize your blog’s design.
- Plugins: To add new features and functionality to your site.
- Settings: For configuring the basic settings of your blog.
Essential Initial Settings to Configure
Before you start creating content, take a few minutes to configure some basic settings.
- Permalinks: Go to Settings > Permalinks. Select the Post name option. This will create clean, SEO-friendly URLs for your blog posts (e.g., yourblog.com/your-first-post) instead of clunky, generic ones.
- Site Title and Tagline: Go to Settings > General. Set your blog’s title and a short, descriptive tagline. This will appear in browser tabs and search engine results.
- Timezone: In the same General settings area, set the correct timezone so your scheduled posts publish at the right time.
Part 2: Designing Your Blog – Creating a Professional Look
First impressions matter. A well-designed blog appears professional, is easy to navigate, and encourages visitors to stay engaged. This section will guide you through creating a beautiful and functional design without any coding.
Step 4: Choosing and Customizing Your Theme
In WordPress, a theme is a template that dictates the overall visual appearance of your blog, from the layout and colors to the typography.
The Role of a WordPress Theme
Think of a theme as the foundational blueprint for your blog’s design. It controls the header, footer, blog post layout, and other global elements. Choosing the right theme is a critical step in building a successful online presence.
What to Look for in a Theme
With thousands of themes available, here’s what to prioritize:
- Speed and Simplicity: A lightweight, bloat-free theme will ensure your blog loads quickly. Performance is crucial for both user experience and SEO.
- Responsiveness: A responsive theme automatically adjusts its layout to look perfect on any device, from desktops to smartphones. This is non-negotiable in today’s mobile-first world.
- Compatibility: Ensure the theme is compatible with popular plugins and, most importantly, with a page builder like Elementor. This gives you the freedom to customize your design beyond the theme’s default settings.
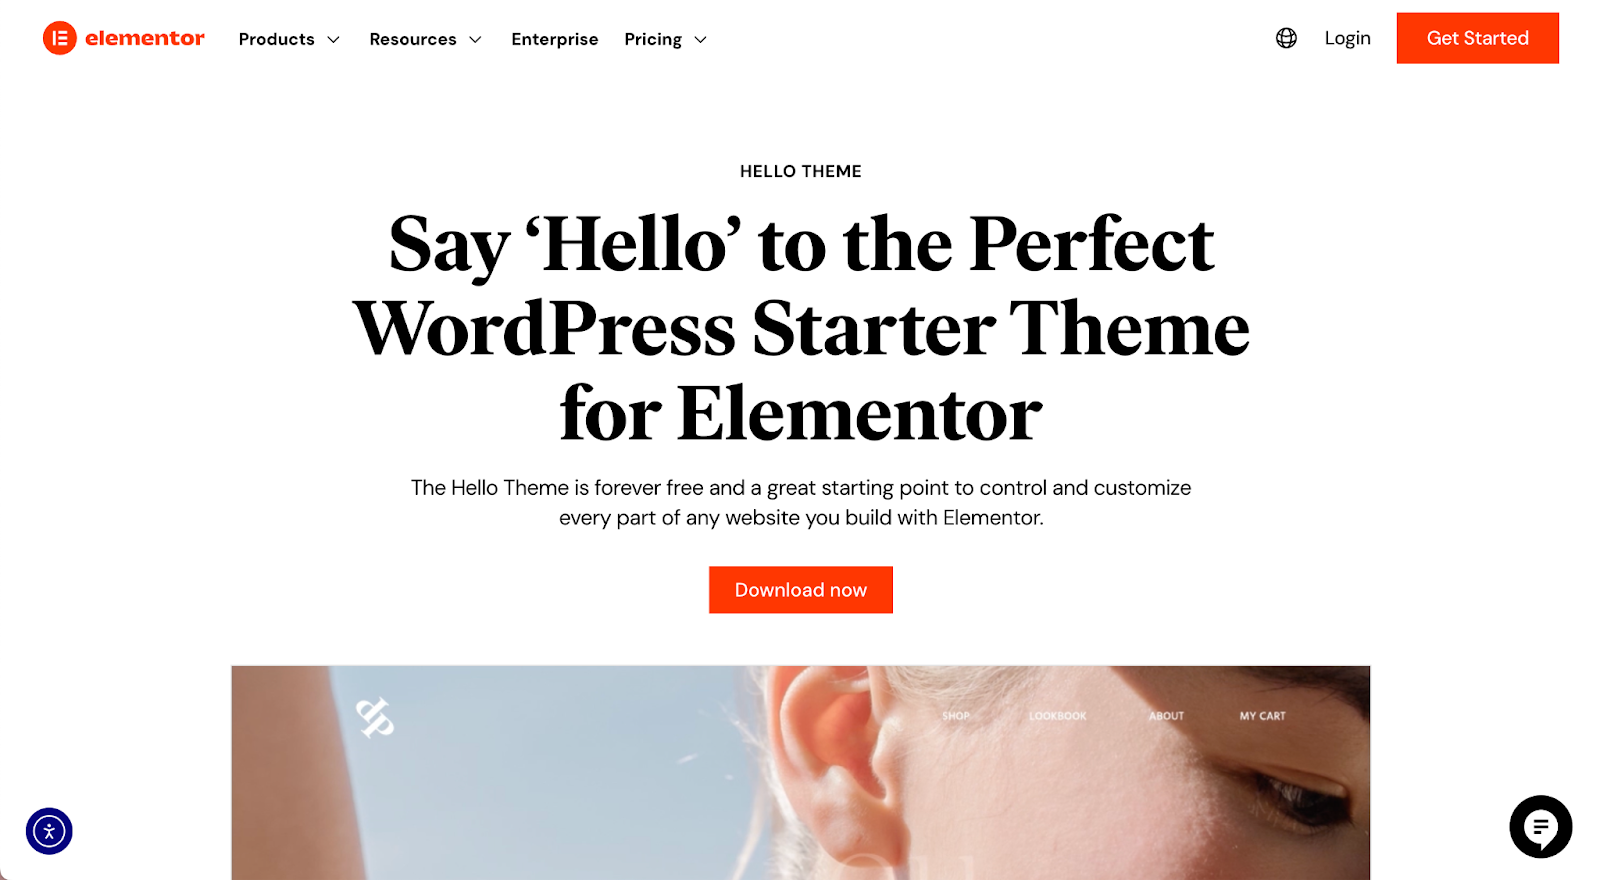
Introducing the Hello Elementor Theme
For those who want complete design control, a minimalist starter theme is the best choice. The Hello Theme is built by the Elementor team and is the perfect foundation for an Elementor-powered website. It’s essentially a blank canvas—speedy and lightweight, with no unnecessary styling or scripts. This prevents conflicts and gives you the creative freedom to build your exact vision using the Elementor editor.
Step 5: Unleashing Creative Control with a Page Builder
While a theme sets the general style, a page builder enables you to design the content of your pages with precision and creativity.
Why Use a Drag-and-Drop Page Builder?
A drag-and-drop page builder transforms the standard WordPress editing experience into a visual, intuitive process. Instead of working with abstract blocks and menus, you can design your pages on the front end and see your changes in real-time. The benefits are significant:
- No Coding Required: You can create complex and professional layouts without touching a single line of code.
- Faster Website Building: Visual editing and pre-made templates significantly accelerate the design process.
- Total Design Freedom: Break free from the limitations of your theme and design every part of your page exactly how you envision it.
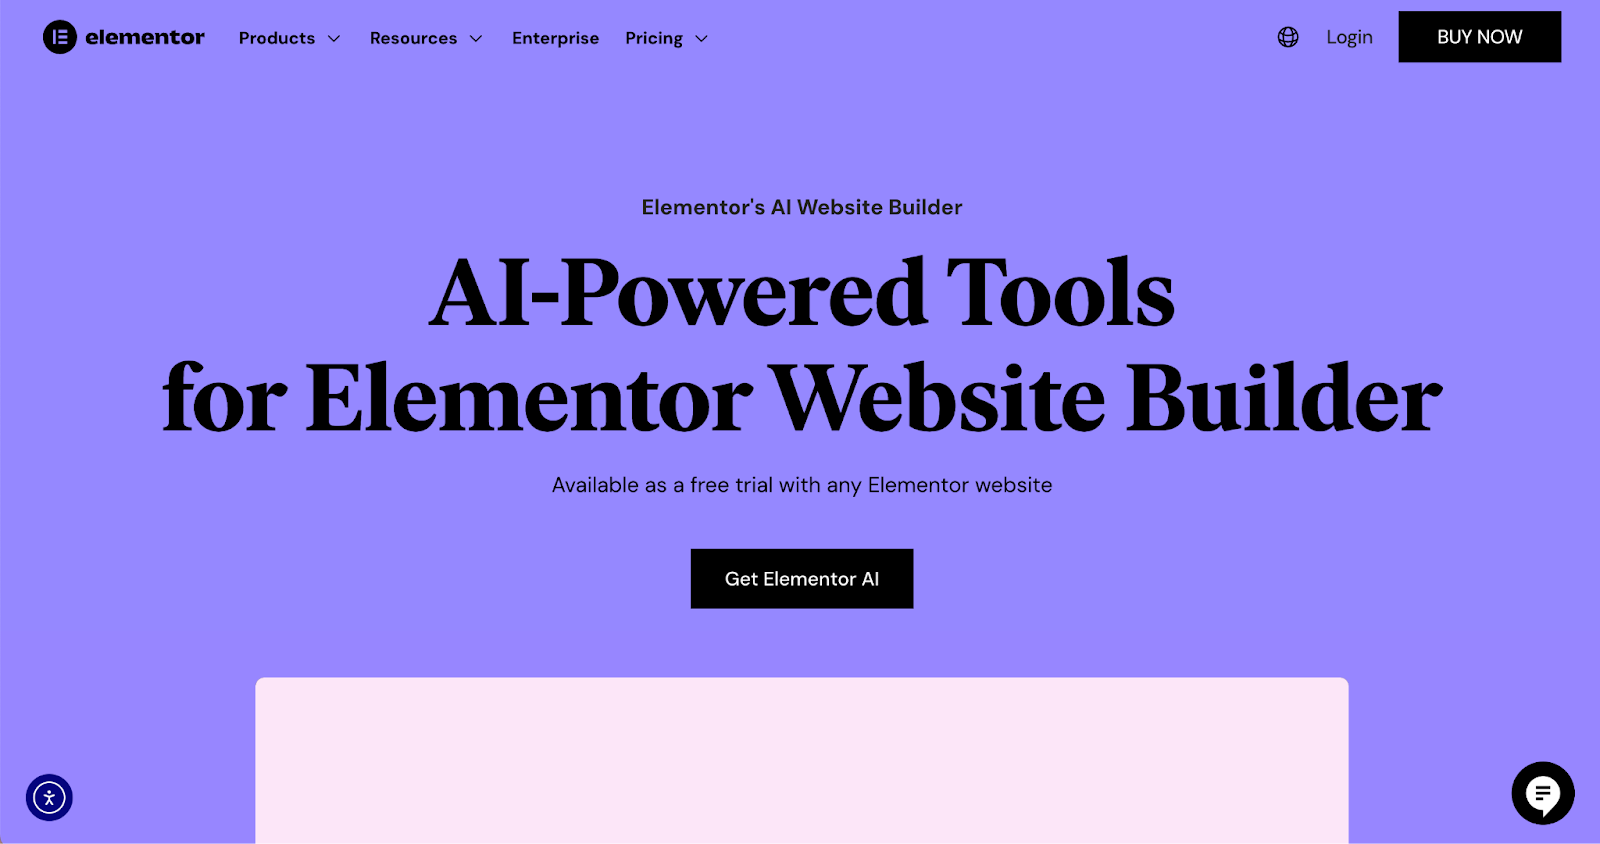
Introducing the Elementor Editor
Elementor is the world’s leading visual website builder for WordPress, trusted by millions of web creators. It provides a powerful yet intuitive platform for designing every aspect of your blog.
Core Features for Beginners
- Live Drag-and-Drop Editor: The interface is simple. You have a panel of design elements (called widgets) on one side and a live preview of your page on the other. Simply drag a widget onto the page to add it.
- Extensive Widget Library: Elementor comes with widgets for virtually any purpose: headings, text, images, videos, buttons, testimonials, social icons, and much more. This robust library gives you the tools to build any section you can imagine.
- Responsive Controls: With a single click, you can switch between desktop, tablet, and mobile views to fine-tune your design for each screen. This ensures a flawless user experience for every visitor, no matter how they access your blog.
Step 6: Planning Your Website Structure with AI
One of the biggest hurdles for beginners is the “blank page” problem—what pages do I need, and what should I put on them? Traditionally, this involved a lot of manual planning, wireframing, and guesswork.
A Faster Way to Plan: Elementor’s Site Planner
To solve this challenge, you can use Elementor’s Site Planner. This innovative AI-powered tool generates a complete website structure, including essential pages, layouts, and tailored content, in just a few minutes.
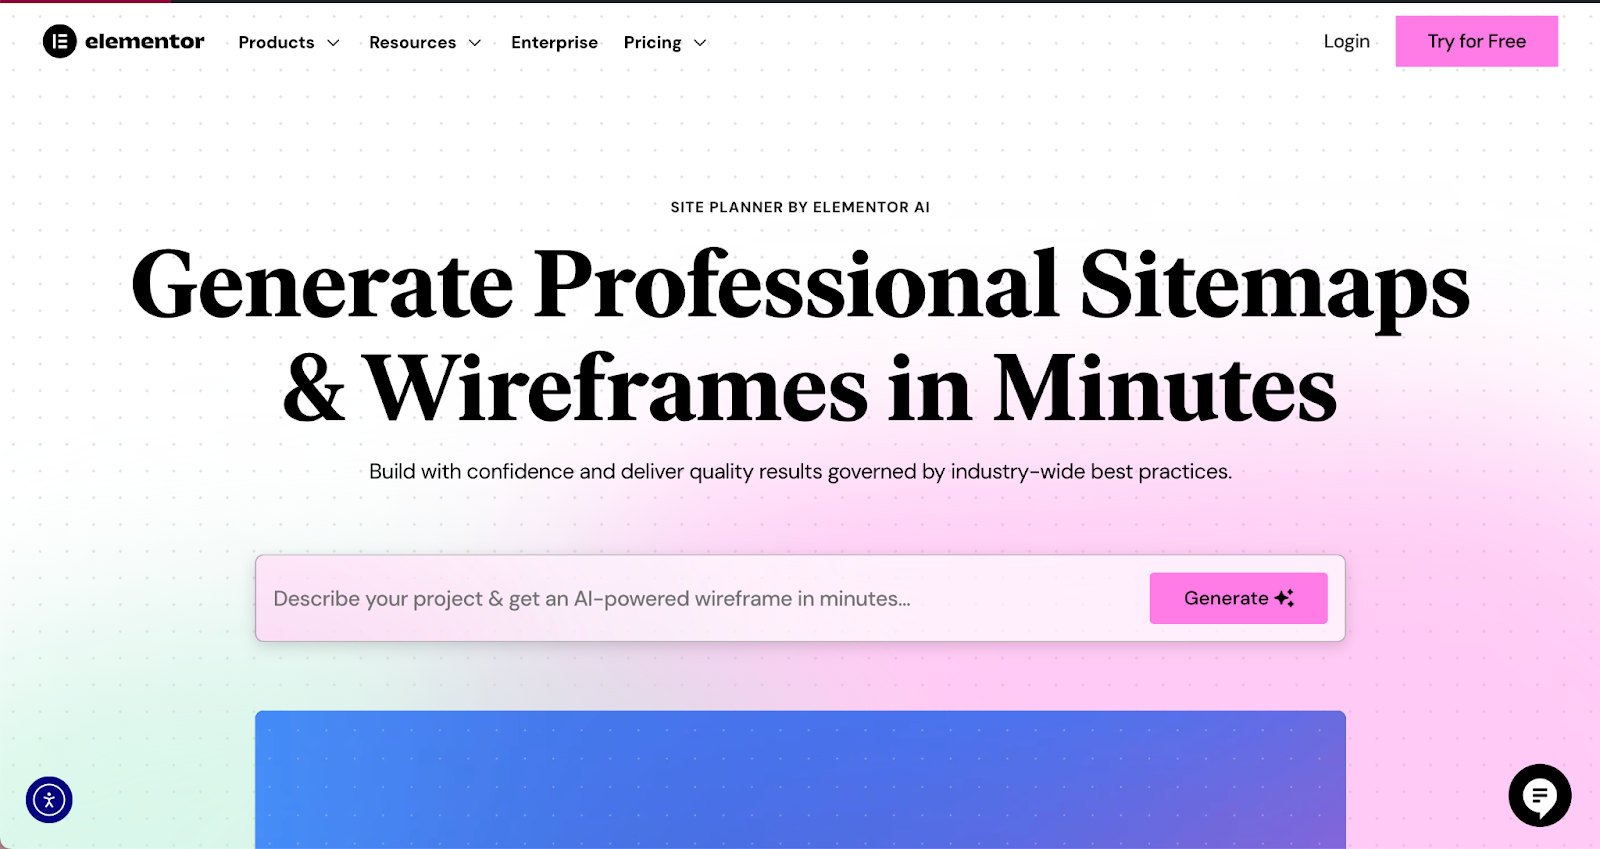
How Site Planner Streamlines Your Workflow
- AI-Powered Chat: You start by answering a few simple, guided questions about your blog—its name, industry, and goals. The AI uses this information to build a blueprint for your site.
- Automated Page Creation: The Site Planner automatically generates a sitemap with all the essential pages your blog needs, such as a Homepage, About page, Contact page, and a Blog page to display your posts.
- Pre-built Layouts and Content: It doesn’t just create blank pages. It populates them with professionally designed layouts and relevant, AI-generated content, giving you a stylized wireframe to customize instead of starting from scratch.
Step 7: Creating Your Essential Blog Pages
With your structure planned, it’s time to customize your core pages using the Elementor editor.
- Homepage: Your homepage is your blog’s front door. Design it to be engaging and to guide visitors to your most important content. Use Elementor to create a compelling hero section with a clear headline, a grid of your latest blog posts, and calls-to-action to subscribe to your newsletter.
- About Page: This is where you connect with your readers on a personal level. Tell your story, explain why you started the blog, and build trust with your audience. A good About page can turn casual visitors into loyal fans.
- Contact Page: Make it easy for readers, potential collaborators, or brands to get in touch. You can use Elementor’s Form Builder widget to create and style a simple, professional contact form directly on the page.
- Blog Page: This is the main archive where all your blog posts will appear. You can use Elementor’s Posts Widget to customize the layout, choosing from different grid or list styles, and controlling details like the featured image size, excerpt length, and metadata.
Part 3: Content Creation & Optimization
With your blog’s design in place, the focus now shifts to its heart and soul: your content. This section covers everything from writing your first post to optimizing it for search engines with the help of essential tools and plugins.
Step 8: Writing and Publishing Your First Blog Post
This is the moment you’ve been working towards. Creating valuable, well-written content is what will make your blog a success.
Brainstorming Compelling Blog Post Ideas
Your content should aim to solve a problem, answer a question, or entertain your audience. Refer back to your niche research and the keywords you discovered. Think about the challenges and interests of your target reader. What would they find genuinely helpful?
Structuring Your Blog Post for Readability
No one likes reading a giant wall of text. Break up your content to make it scannable and easy to digest. Follow these best practices:
- Use Clear Headings and Subheadings (H2, H3): Organize your post into logical sections.
- Write Short Paragraphs: Keep paragraphs to 3-4 sentences.
- Use Bullet Points and Numbered Lists: These are perfect for summarizing information or listing steps.
- Highlight Key Phrases: Use bold or italics to draw attention to important points.
Using the WordPress Block Editor (Gutenberg)
WordPress comes with a default content editor known as the Block Editor or “Gutenberg.” It allows you to build your post using different “blocks” for paragraphs, headings, images, quotes, and more. It’s an intuitive system for basic post formatting.
Enhancing Your Content with Elementor AI
To accelerate your writing process and overcome writer’s block, you can leverage an AI assistant directly within your workflow. Elementor AI is a creative partner built into the Elementor editor, designed to help you generate and refine content faster.
How AI Can Help You Write Faster
- Generate Ideas and Outlines: If you’re stuck, ask the AI to brainstorm blog post titles or create a structured outline for your topic.
- Write and Refine Copy: Use it to draft introductions, write compelling headlines, or polish your paragraphs for clarity and tone. You can generate entire sections of text directly where you need them, saving you from switching between different applications.
- Translate Content: If you want to reach a global audience, Elementor AI can help translate your text into different languages.
Step 9: Essential WordPress Plugins for Your Blog
Plugins are like apps for your website. They extend the functionality of WordPress, allowing you to add new features for everything from SEO to security.
Must-Have Plugins for Every Blog
Here are some of the most important types of plugins to install:
- SEO (Search Engine Optimization): An SEO plugin like Yoast SEO or Rank Math is non-negotiable. It guides you through optimizing your posts and pages to rank better in search results by helping you manage titles, descriptions, and keywords.
- Performance: Site speed is critical.
- Image Optimization: Large images are one of the biggest causes of slow websites. A plugin like Image Optimizer by Elementor automatically compresses and converts your images to next-gen formats like WebP upon upload. This significantly improves your site’s load time without sacrificing visual quality and works on any WordPress site, not just those built with Elementor.
- Caching: A caching plugin creates static versions of your pages so they can be delivered to visitors much faster. WP Super Cache is a great free option to start with.
- Security: To protect your blog from hackers and malware, install a security plugin. All In One WP Security offers a good range of free features to harden your site’s defenses.
- Backups: In case anything goes wrong, having a recent backup of your site is a lifesaver. Plugins like Duplicator or services like VaultPress can automate this process.
- Email Deliverability: By default, WordPress emails (like password resets or contact form notifications) can sometimes be unreliable or land in spam folders. Site Mailer by Elementor solves this by ensuring your crucial transactional emails are delivered reliably, without you needing to configure complex SMTP settings.
- Accessibility: Making your website usable for everyone, including people with disabilities, is important. Ally by Elementor is a plugin that helps you improve your site’s accessibility with features like a usability widget for visitors and a generator for creating an accessibility statement.
Step 10: Optimizing Your Blog for Search Engines (SEO)
SEO is the practice of making your blog more visible in search engine results like Google. Getting this right means more organic traffic from people actively searching for your content.
The Basics of On-Page SEO
On-page SEO refers to the optimizations you make directly on your blog.
- Keyword Research: Identify the main keyword or phrase for each blog post. This is the term you want the post to rank for.
- Title Tags and Meta Descriptions: Your SEO plugin will let you customize the title and description that appear in search results. Make them compelling to encourage clicks.
- Image Alt Text: Add descriptive alt text to every image. This helps search engines understand what the image is about and is crucial for screen readers used by visually impaired visitors.
- Internal Linking: Whenever you write a new post, link to other relevant articles on your own blog. This helps search engines discover your content and keeps visitors on your site longer.
The Importance of Site Speed and Mobile-Friendliness
Google explicitly favors websites that load quickly and work well on mobile devices. By choosing a performance-focused solution like Elementor Hosting, using a lightweight theme like Hello, optimizing your images, and using a caching plugin, you’re already setting yourself up for success.
Setting Up Google Analytics and Google Search Console
These two free tools from Google are essential.
- Google Analytics: Tracks who is visiting your site, how they found you, and which pages are most popular.
- Google Search Console: Shows you how your site is performing in Google search, which keywords you’re ranking for, and alerts you to any technical SEO issues.
Part 4: Promotion & Monetization – Growing Your Audience and Income
Creating a great blog is only half the battle. Now you need to get it in front of people and, if you choose, turn it into a source of income. This final section covers strategies for promoting your content and monetizing your efforts.
Step 11: Promoting Your Blog and Driving Traffic
You can’t just publish a post and expect readers to find it. You need to be proactive in promoting your content.
Content Promotion Strategies
- Email Marketing: Building an email list is one of the most valuable things you can do. It gives you a direct line of communication with your most loyal readers. Use Elementor’s Form Builder to create newsletter signup forms and place them strategically on your blog—in your sidebar, footer, or as a popup.
- Social Media: Identify the social media platforms where your target audience spends their time and share your blog posts there. Create engaging graphics and tailor your message for each platform.
- Community Engagement: Become an active participant in communities related to your niche. Join Facebook groups, Reddit communities, or online forums. Answer questions and share your expertise, and link back to your blog posts when it’s relevant and helpful.
- Guest Posting: Write an article for another blog in your niche. This introduces you to a new, relevant audience and helps you build valuable backlinks, which are great for SEO.
Step 12: Monetizing Your WordPress Blog
Once you have a steady stream of traffic, you can start thinking about monetization. There are many ways to earn an income from your blog.
Popular Monetization Methods
- Affiliate Marketing: This is one of the most common methods for bloggers. You recommend products or services to your readers, and when they make a purchase through your unique affiliate link, you earn a commission.
- Display Advertising: You can place ads on your blog through networks like Google AdSense or Mediavine. You earn money based on ad views or clicks.
- Selling Digital Products: Create and sell your own products, such as ebooks, online courses, printable templates, or stock photos. This can be highly profitable as you keep most of the revenue.
- Offering Services: Your blog can serve as a portfolio to attract clients for services like coaching, consulting, freelance writing, or design.
- eCommerce: Want to sell physical products? With Elementor’s powerful integration with WooCommerce, you can build a complete online store right on your WordPress site. Customize everything from the product listings and single product pages to the shopping cart and checkout process, all with Elementor’s visual drag-and-drop interface.
Conclusion: Your Blogging Journey Starts Now
Congratulations! You’ve made it through the complete guide to starting a WordPress blog. You now have the knowledge and the roadmap to take your idea and turn it into a real, professional blog that can reach people all over the world.
Recap of the Key Steps
We’ve covered the entire process, from laying a solid foundation with the right niche and hosting, to designing a beautiful site with a theme and page builder. We’ve walked through creating and optimizing your content, promoting it to find your audience, and exploring the different paths to monetization.
The Importance of Consistency and Patience
Building a successful blog doesn’t happen overnight. It requires consistent effort, patience, and a willingness to learn and adapt. Keep creating valuable content, engage with your audience, and don’t be afraid to try new things. The most successful bloggers are the ones who stick with it.
Your Next Steps
The only thing left to do is start. Take that first step. Choose your niche, get your hosting, and begin building. With powerful and user-friendly tools like WordPress and Elementor at your fingertips, you have everything you need to create a professional blog without the technical barriers that once stood in the way.
Your story is waiting to be told. Your audience is waiting to find you. Your blogging journey starts now.


