
Email authenticationIt plays a critical role in improving deliverability, preventing email spoofing, and maintaining your sender reputation.
Without proper authentication, emails may end up in spam folders or, worse, be used maliciously for phishing or spoofing attacks. This guide will walk you through the three main authentication methods: SPF, DKIM, and DMARC, and how to implement them effectively.
What Is Email Authentication?
Email authentication is a way to confirm the legitimacy of the sender’s domain. It is the process of verifying that an email message from a particular domain is actually coming from that domain.
Without it, email providers like Gmail are less likely to flag spam and phishing emails that try to trick recipients into disclosing sensitive information or into clicking harmful links.

Thanks, but no thanks!
With authentication, email providers like Gmail and Outlook can better determine whether an email should be trusted. By verifying the authenticity of the sender’s domain, these protocols improve email security and ensure messages reach the intended inboxes.
Improve your email deliverability with Site Mailer
How Site Mailer Supports Email Authentication
Site Mailer simplifies the process of implementing all three major email authentication methods—SPF, DKIM, and DMARC—by providing built-in support and detailed guidance for domain setup.
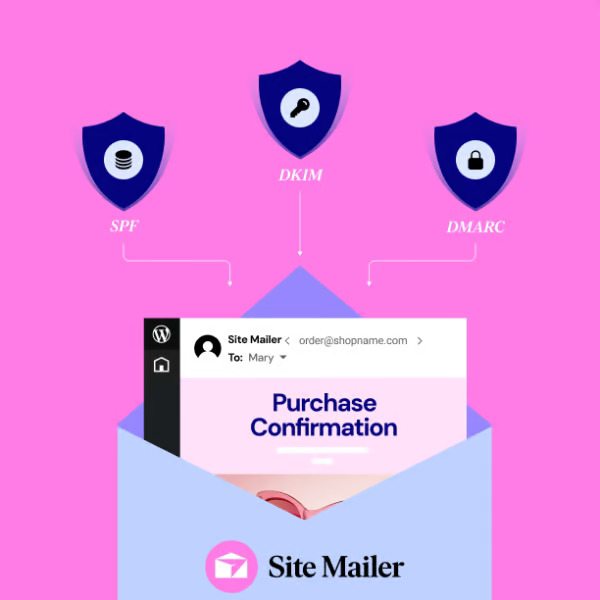
Core Email Authentication Methods
1. SPF (Sender Policy Framework)

What It Is
SPF is a protocol that allows domain owners to specify which mail servers are authorized to send emails on their behalf.
How It Works
When an email is sent, the recipient’s server checks the sender’s IP address against the SPF record in the DNS. If the IP matches, the email passes authentication.
Steps to Implement SPF:
Before making any changes, you can verify whether you need an SPF record (or check your current SPF record) by using MXToolbox’s SPF lookup tool:
???? MXToolbox SPF Check
- Create an SPF Record: Log in to your DNS provider and create a TXT record.
- Define Authorized Servers: Use the following example to create your SPF record:
v=spf1 include:_spf.google.com ~all- v=spf1: Specifies SPF version 1.
- include:_spf.google.com: Authorizes Google’s mail servers.
- ~all: Soft fail for unauthorized senders.
- Publish the Record: Save the TXT record in your DNS settings.
2. DKIM (DomainKeys Identified Mail)

What It Is
DKIM (DomainKeys Identified Mail) is an email authentication method that adds a digital signature to outgoing emails. This ensures the email is authentic and has not been altered during transit. It helps prevent spoofing and improves email deliverability by verifying the sender’s domain.
How It Works
DKIM uses a public-private key pair to verify email authenticity:
- The sender’s private key signs the email.
- The recipient’s server uses the public key (published in the sender’s DNS) to validate the signature.
For most modern email providers, key management is automated. You don’t need to manually generate or handle keys—your provider takes care of this for you. Instead, you typically just need to add CNAME records to your DNS.
Steps to Implement DKIM:
Access Your Email Provider’s DKIM Settings
Log in to your email provider’s admin console (e.g., Google Workspace, Microsoft 365, or others) and locate the DKIM setup section.
Copy the Provided CNAME Records
Your email provider will generate two or more CNAME records. These records contain the necessary details to connect your domain’s DNS to their DKIM infrastructure.
Add the CNAME Records to Your DNS
- Log in to your domain registrar or DNS hosting provider (e.g., GoDaddy, Cloudflare).
- Add the CNAME records exactly as provided by your email provider. Each record typically includes:
- Name/Host: A selector followed by _domainkey (e.g., selector1._domainkey).
- Value/Target: Points to your provider’s DKIM infrastructure (e.g., selector1.yourprovider.com).
Verify Your DKIM Setup
- Return to your email provider’s DKIM settings and run a verification test.
- Use tools like MXToolbox DKIM Lookup to confirm that the DKIM record is properly published.
Enable DKIM Signing
Once verification is complete, activate DKIM signing for outgoing emails in your provider’s admin console.
3. DMARC (Domain-based Message Authentication, Reporting, and Conformance)

What It Is
DMARC builds on SPF and DKIM, giving domain owners control over how unauthenticated emails are handled.
How It Works
DMARC policies dictate whether unauthenticated emails should be accepted, quarantined, or rejected.
Steps to Implement DMARC:
- Publish a DMARC Record: Add a TXT record to your DNS. Example:
v=DMARC1; p=none; rua=mailto:[email protected];- v=DMARC1: Specifies DMARC version 1.
- p=none: Monitor mode (does not reject emails yet).
- rua: Email address for DMARC reports.
- Set Policies Gradually: Start with p=none, then move to quarantine or reject as you gain confidence.
- Monitor Reports: Use the reports to fine-tune your authentication setup.
Why Email Authentication Matters
- Prevents Spoofing: Protects against phishing and impersonation attacks.
- Improves Deliverability: Ensures emails land in inboxes, not spam.
- Maintains Reputation: Builds trust with recipients and ISPs.
How to Check Your Authentication Setup
One of the easiest ways to check authentication is to go into your email and examine the original header of the email. In Gmail, this is accessible through the “Show Original” button:

You can also use these tools to verify your setup:
Conclusion
SPF, DKIM, and DMARC are essential for securing email and ensuring deliverability. Start with SPF, add DKIM for integrity, and implement DMARC for full control. Audit your current setup today using tools like MXToolbox, and take the first step toward safer, more effective email communication.


