
This comprehensive guide will walk you through everything you need to know about WordPress image sizes. We’ll cover the default image sizes in WordPress, how to customize them, and best practices for optimizing your images for speed and quality. We will also explore how tools like the Elementor Website Builder can streamline your image management workflow.
Understanding WordPress’s Default Image Sizes
When you upload an image to your WordPress Media Library, WordPress automatically creates several copies of that image in different sizes. This is a built-in feature designed to help you use the most appropriate image size for various locations on your site without having to manually resize each one. For instance, a small thumbnail is suitable for a blog feed, while a larger image is needed for a full-width header.
By default, WordPress generates the following image sizes:
- Thumbnail: 150 x 150 pixels (square-cropped).
- Medium: A maximum width and height of 300 x 300 pixels.
- Medium_Large: A maximum width of 768 pixels (with no height limit).
- Large: A maximum width and height of 1024 x 1024 pixels.
- Full Size: The original, untouched dimensions of the image you uploaded.
It’s important to note that WordPress themes and some plugins can also register their own specific image sizes, which are tailored to their unique layouts and functionalities. This means you might see additional size options beyond the default ones.
How WordPress Handles Image Resizing
When creating these different sizes, WordPress maintains the original aspect ratio of your image for the ‘Medium’ and ‘Large’ versions. This means the image is scaled down until its longest side fits within the maximum dimensions you’ve set, preventing distortion. For ‘Thumbnail’ size, however, WordPress crops the image by default to fit the exact 150×150 pixel dimensions, which usually means trimming from the center.
This automatic resizing process is the foundation of WordPress’s responsive image handling. By having multiple sizes available, WordPress can serve the most appropriately sized image based on the visitor’s screen size, which is a critical factor for mobile-friendliness and page speed.
Customizing WordPress Image Sizes
While the default image sizes are a good starting point, they may not always align perfectly with your website’s design. Fortunately, WordPress provides straightforward ways to adjust these default sizes and even add new, custom ones.
Changing the Default Image Sizes
If you find that the default thumbnail, medium, and large sizes don’t suit your theme’s layout, you can easily change their dimensions.
- Navigate to your WordPress Dashboard.
- Go to Settings > Media.
- Here, you’ll see the fields to change the ‘width’ and ‘height’ for the Thumbnail, Medium, and Large sizes.
- Enter your desired dimensions in pixels. For thumbnails, you also have the option to ‘Crop thumbnail to exact dimensions.’ If you uncheck this, the thumbnail will be resized proportionally like the other sizes.
- Click Save Changes.
Keep in mind that these new settings will only apply to images you upload from this point forward. They will not affect the images already in your Media Library. To apply these new sizes to existing images, you’ll need to regenerate your thumbnails, which we’ll cover later in this guide.
Adding Custom Image Sizes with Code
For more advanced control, or if your theme requires specific image dimensions not covered by the defaults, you can register new custom image sizes. This is typically done by adding a snippet of code to your theme’s functions.php file.
A word of caution: Editing the functions.php file can break your site if not done correctly. It’s highly recommended to use a child theme for these kinds of modifications. This ensures that your changes aren’t lost when you update the parent theme.
To add a new image size, you’ll use the add_image_size() function. The basic structure of this function is:
add_image_size( ‘your-custom-name’, $width, $height, $crop );
Let’s break down the parameters:
- ‘your-custom-name’: A unique name for your new image size (e.g., ‘blog-featured-image’).
- $width: The width of the image in pixels.
- $height: The height of the image in pixels.
- $crop: A boolean value (true or false). If set to true, the image will be hard-cropped to the exact dimensions. If false (or omitted), it will be soft-cropped (resized proportionally).
Example of Adding a Custom Image Size:
Let’s say you want to create a specific size for your blog’s featured images that is 800 pixels wide and 450 pixels tall, and you want it to be cropped to these exact dimensions. You would add the following to your functions.php file:
add_image_size( ‘blog-featured-image’, 800, 450, true );
To make this new custom size selectable in the WordPress editor, you can add another filter to your functions.php file:
PHP
function my_custom_image_sizes( $sizes ) {
return array_merge( $sizes, array(
‘blog-featured-image’ => __( ‘Blog Featured Image’ ),
) );
}
add_filter( ‘image_size_names_choose’, ‘my_custom_image_sizes’ );
This will add “Blog Featured Image” as an option in the image size dropdown menu within the block editor.
The Importance of Regenerating Thumbnails
As mentioned earlier, changing default image sizes or adding new custom sizes only affects newly uploaded images. Your existing media library remains unchanged. To apply these new size settings to your older images, you need to “regenerate thumbnails.”
Manually re-uploading every image would be a time-consuming and impractical task, especially for sites with a large number of images. This is where thumbnail regeneration plugins come to the rescue.
Using a Plugin to Regenerate Thumbnails
Several excellent plugins can automate this process for you. One of the most popular and reliable is reGenerate Thumbnails Advanced.
Here’s how to use it:
- From your WordPress dashboard, go to Plugins > Add New.
- Search for “reGenerate Thumbnails Advanced,” then install and activate it.
- Once activated, navigate to Tools > Regenerate Thumbnails.
- The plugin gives you the option to regenerate thumbnails for all your images or just for your featured images. You can also select specific images to regenerate.
- Click the “Regenerate” button to start the process. The plugin will go through your media library, find all the original images, and create new versions based on your current media settings and any custom sizes defined in your theme.
Another popular option is the Force Regenerate Thumbnails plugin, which also allows you to delete old, unused image sizes, helping to clean up your server space.
Best Practices for WordPress Image Sizes and Optimization
Managing image dimensions is just one part of the equation. To ensure your website is fast, efficient, and user-friendly, you need to follow a comprehensive set of image optimization best practices.
1. Choose the Right Image Dimensions Before Uploading
While WordPress does a great job of creating smaller image sizes, you should still resize your images to a reasonable dimension before uploading them. Uploading a 5000-pixel wide image from a DSLR camera when your website’s content area is only 1200 pixels wide is unnecessary. This consumes extra server storage and processing power.
As a general rule, determine the maximum display width for images on your site and resize your images to be no wider than that. For full-width images, a width of 1920 to 2560 pixels is often sufficient for most modern screens.
2. Compress Your Images
Image compression is the process of reducing the file size of your images without a significant loss in quality. This is one of the most impactful optimizations you can make for your site’s speed. There are two main types of compression:
- Lossless Compression: This method reduces file size by removing non-essential metadata from the image file without affecting the pixel data. The quality remains identical to the original.
- Lossy Compression: This method achieves a much smaller file size by permanently removing some of the image data. While there is a slight reduction in quality, it’s often imperceptible to the human eye when done correctly.
You can compress images before uploading using desktop tools like Adobe Photoshop or online tools like TinyPNG. Alternatively, you can use a WordPress plugin to automate this process.
3. Use an Image Optimization Plugin
For a hands-off approach, an image optimization plugin is an invaluable tool. These plugins can automatically compress images upon upload, resize them, and even convert them to next-gen formats.
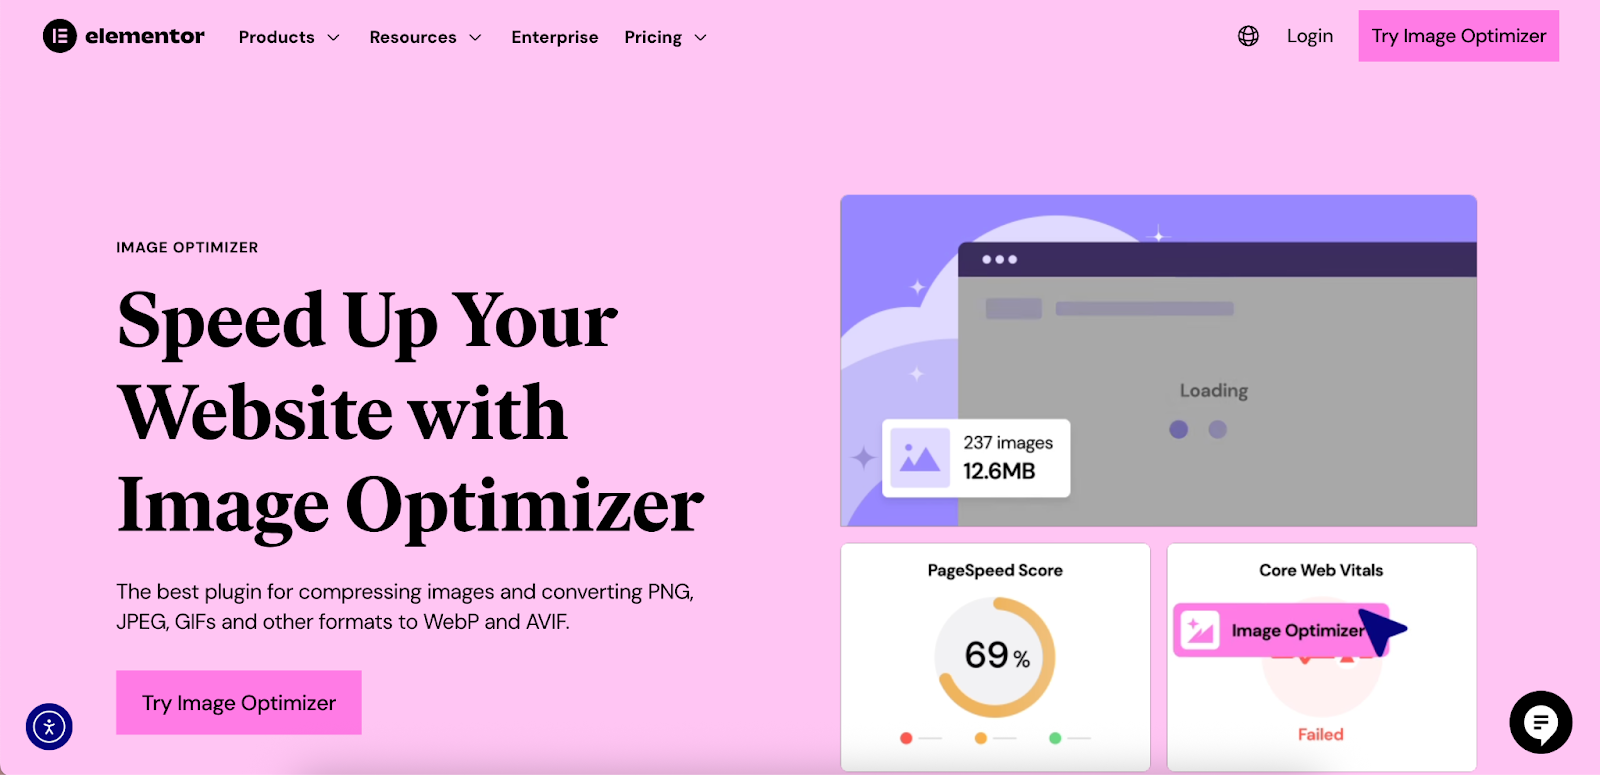
Elementor users can leverage the Image Optimizer plugin, which seamlessly integrates into the WordPress environment. This plugin offers both lossy and lossless compression, the ability to convert images to modern formats like WebP and AVIF, and bulk optimization for your existing media library. A key advantage is that it performs the heavy lifting of optimization on Elementor’s servers, preventing any slowdown on your own site during the process.
4. Choose the Correct File Format
The file format of your images also plays a significant role in file size and quality. The most common formats for the web are:
- JPEG (or JPG): Ideal for photographs and images with complex colors and gradients. JPEGs can be compressed significantly while maintaining good quality.
- PNG: Best for images that require a transparent background, such as logos and icons. PNGs use lossless compression, which can result in larger file sizes for complex images compared to JPEGs.
- WebP: A modern image format developed by Google that provides superior lossless and lossy compression for images on the web. WebP images are significantly smaller than their JPEG and PNG equivalents, leading to faster load times.
- AVIF: Another next-generation format that offers even better compression than WebP. Browser support is growing, making it a viable option for further performance gains.
- GIF: Primarily used for animated images. For static images, PNG or JPEG is almost always a better choice.
Many modern image optimization plugins, including Elementor’s Image Optimizer, can automatically convert your uploaded JPEGs and PNGs to WebP or AVIF and serve them to compatible browsers, while providing the original format as a fallback.
5. Leverage Lazy Loading
Lazy loading is a technique that defers the loading of images until they are about to enter the user’s viewport. This means that images at the bottom of a page won’t be loaded until the user scrolls down to them. This dramatically improves initial page load times, especially for pages with many images.
Since WordPress 5.5, lazy loading is a native feature for images. WordPress automatically adds the loading=”lazy” attribute to <img> tags. Most modern browsers support this attribute, so you may not need a separate plugin for this functionality unless you require more advanced control.
6. Understand Responsive Images (srcset and sizes)
WordPress has supported responsive images natively since version 4.4. It automatically adds the srcset and sizes attributes to the <img> tag in your HTML.
- The srcset attribute provides a list of all the available sizes for a particular image.
- The sizes attribute gives the browser information about how wide the image will be at different viewport sizes.
With this information, the browser can intelligently choose the most appropriate image from the srcset list to download and display. For example, a user on a small mobile screen will get a smaller, faster-loading image, while a user on a large desktop monitor will receive a higher-resolution version. This all happens automatically in the background, ensuring a better user experience across all devices.
Using Elementor to Manage Your Images
For those who build their websites with Elementor, managing images becomes an even more streamlined process. Elementor provides a visual, drag-and-drop interface that simplifies how you work with images, along with powerful features to optimize them.
Visual Control Over Image Sizes
Within the Elementor editor, when you add an Image widget to your page, you have direct control over the image size that is displayed. In the widget’s settings panel, you can choose from all the available registered image sizes, including the WordPress defaults and any custom sizes you’ve added. This allows you to select the most appropriate size for the context, preventing you from serving an unnecessarily large image.
Advanced Design and Styling
Elementor’s Image widget also offers extensive styling options. You can apply borders, shadows, and CSS filters, and even create complex animations and motion effects. These capabilities allow for a high degree of creative control, enabling you to build visually rich layouts without writing any code.
The Elementor Image Optimizer
As mentioned earlier, the Image Optimizer by Elementor is a powerful plugin that automates many of the best practices we’ve discussed. Its key features include:
- Automatic Compression: Compresses images on upload with both lossy and lossless options.
- WebP & AVIF Conversion: Converts images to next-gen formats for superior performance.
- Bulk Optimization: Optimizes your entire existing media library with a single click.
- Resizing: Automatically resizes images that exceed a maximum width you define.
- Background Optimization: Processes images on Elementor’s servers to avoid slowing down your site.
By integrating this plugin into your workflow, you can ensure that every image on your site is fully optimized for speed and quality with minimal effort.
Troubleshooting Common WordPress Image Issues
Even with a good understanding of image sizes and optimization, you may occasionally run into problems. Here are some common issues and their solutions:
- Images Not Displaying: This can be caused by incorrect file permissions on your server, a plugin conflict, or an issue with your Content Delivery Network (CDN). Check your file permissions, temporarily deactivate plugins to identify a conflict, and check your CDN settings.
- HTTP Error During Upload: This vague error can be caused by several factors, including insufficient PHP memory. You can try increasing your website’s PHP memory limit.
- Pixelated or Blurry Images: This usually happens when you display an image at a size larger than its original dimensions. Always upload images that are at least as large as the maximum size you intend to display them at. Over-compression can also cause a loss of quality.
- Featured Image Not Showing: This is often a theme-related issue. Ensure your theme supports post thumbnails and that the correct template tag (the_post_thumbnail()) is being used in the theme’s files. It can also be a plugin conflict.
Final Thoughts
Mastering WordPress image sizes is an essential skill for any website owner or developer. By understanding how WordPress handles images, customizing sizes to fit your design, and diligently following optimization best practices, you can create a website that is both beautiful and blazingly fast.
Leveraging powerful tools like the Elementor Website Builder and its accompanying Image Optimizer plugin can significantly simplify and automate this process, freeing you up to focus on creating amazing content and growing your online presence. By taking the time to properly manage your images, you’ll provide a better experience for your visitors, improve your SEO rankings, and set your website up for long-term success.


